Key Takeaways
- Mineral buildup is the primary cause of low water pressure.
- Avoid bleach as it can increase harmful bacteria like MAC.
- Specialized finishes (matte black, gold) require shorter soaking times.
Most homeowners don't realize that their daily "refreshing" shower might actually be a delivery system for millions of microscopic organisms. Learning how to clean showerhead fixtures is about more than just maintaining a shiny bathroom; it is a critical step in household hygiene and plumbing maintenance. Over time, mineral deposits like calcium carbonate (limescale) and biological "gunk" called biofilm accumulate inside the nozzles, leading to uneven spray patterns and significantly reduced water pressure.
In this guide, we will explore the best way to clean showerhead components using the latest 2025 industry standards, including eco-friendly probiotic methods and the classic vinegar soak. Whether you are dealing with a modern rain showerhead or a standard chrome fixture, these professional steps will restore your flow and protect your health.
Why Showerhead Maintenance is Critical in 2025
As we move into 2026, the cleaning industry has shifted its focus from "sterile" surfaces to "balanced" ones. Recent research has revealed that the interior of a showerhead is a primary breeding ground for Mycobacterium avium (MAC), a pathogen linked to pulmonary issues. Interestingly, MAC levels in U.S. showerheads are approximately 2.3 times higher than in European ones, largely due to the bacteria's resistance to the chlorine levels used in American municipal water systems.
Furthermore, if you live in a hard water region (like much of the Midwest or Southwest), mineral buildup can begin to restrict water flow in as little as two weeks. This doesn't just ruin your shower experience; it puts unnecessary backpressure on your plumbing and can lead to leaks over time.
The Best Way to Clean Showerhead Without Removal
If you don't want to break out the wrench, the "Baggy Method" remains the gold standard for routine maintenance. It is effective, hands-off, and allows the acidic solution to penetrate deep into the nozzles.
The Vinegar Baggy Method
This is the most popular DIY solution because it requires minimal tools.
- Prepare the Bag: Fill a sturdy plastic gallon-sized bag halfway with distilled white vinegar.
- Submerge: Place the bag over the showerhead until all the nozzles are fully submerged.
- Secure: Use a heavy-duty rubber band or a zip tie to secure the bag to the shower arm.
- Wait: For standard chrome, let it soak for 1–4 hours.
- Rinse: Remove the bag, run the hot water for 2 minutes, and scrub the faceplate with a soft toothbrush.
How to Clean Showerhead Without Bleach
Many people instinctively reach for the bleach when they see mold or mildew, but this is a mistake. When considering how to clean showerhead without bleach, it is important to understand the science: bleach can actually corrode internal rubber seals and, surprisingly, has been shown to increase the production of certain harmful bacteria by killing off their competitors.
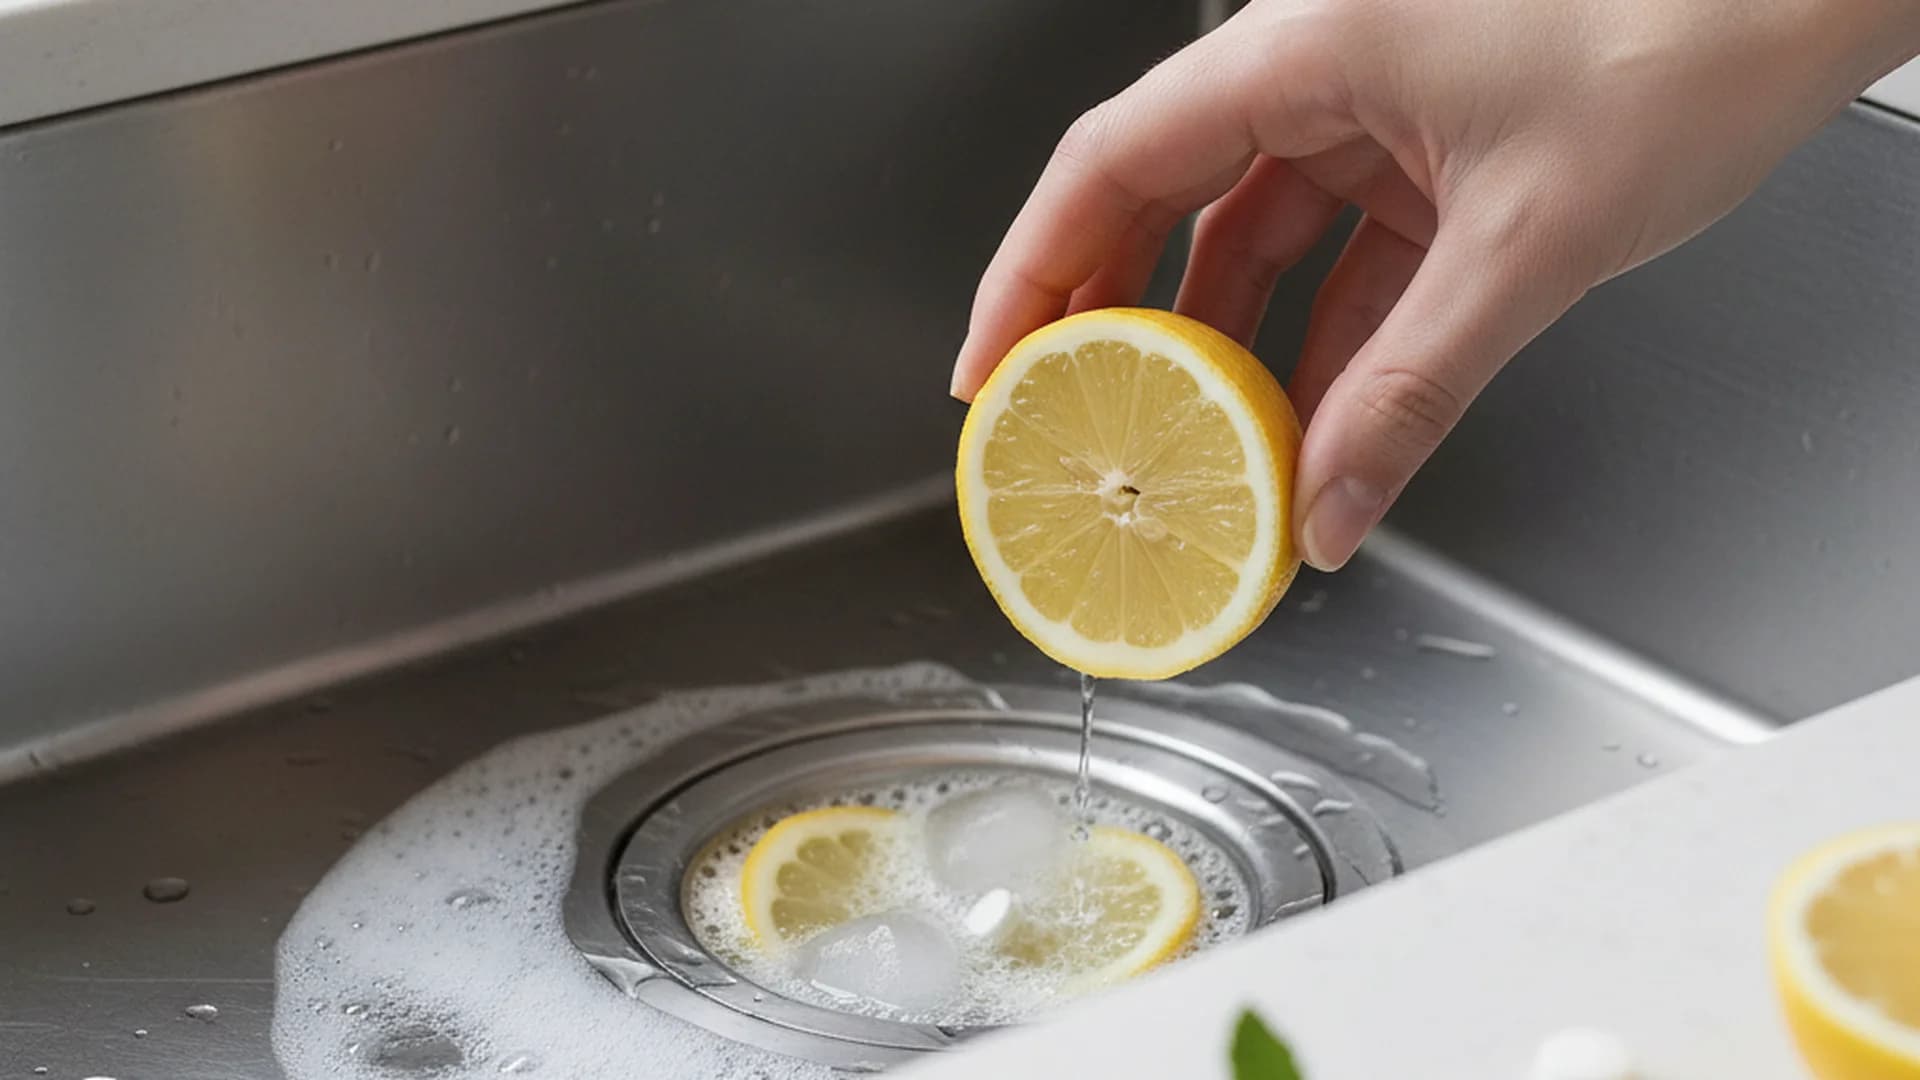
Using Citric Acid or Lemon Juice
Citric acid is a fantastic natural descaler. You can use bottled lemon juice or buy citric acid powder (often found in the canning section of the grocery store).
- The Mix: Dissolve 2 tablespoons of citric acid powder in 1 quart of warm water.
- The Benefit: It smells significantly better than vinegar and is slightly less aggressive on certain metal lacquers.
The Rise of Probiotic Cleaners
In 2025, we are seeing a massive trend toward "Microbiome-Friendly" cleaning. Products like Cif Infinite Clean utilize live beneficial bacteria to consume the organic biofilm (the "gunk") that feeds pathogens. These cleaners keep working for up to 72 hours after application, preventing mold from re-establishing itself.
Deep Cleaning Protocol: Removing the Showerhead
Every 3 to 6 months, you should perform a deep clean that involves removing the fixture. This allows you to access the internal filter screen, which is often the culprit behind persistent low pressure.
Step 1: Removal
Use an adjustable wrench to unscrew the showerhead from the shower arm. To prevent scratching the finish, wrap the nut in a soft cloth before applying the wrench.
Step 2: Clean the Filter Screen
Look inside the threaded end of the showerhead. You will see a small mesh screen. Use tweezers to gently remove it and rinse it under high-pressure water to clear out sand, pipe grit, or mineral flakes.
Step 3: Deep Soak
Submerge the entire disassembled showerhead in a deep bowl of vinegar or a commercial descaler (like CLR). If you use a commercial descaler, it will work up to 3x faster than vinegar, but ensure it is safe for your specific finish.
Step 4: Reinstallation
Before screwing the showerhead back on, strip off the old plumber’s tape and wrap the threads with 2-3 turns of fresh PTFE (Plumber’s) tape. This ensures a leak-proof seal.
| Finish Type | Recommended Cleaner | Max Soak Time |
|---|---|---|
| Chrome | White Vinegar | 8 Hours |
| Plastic | White Vinegar | 8 Hours |
| Matte Black | Lemon Juice/Diluted Vinegar | 30 Minutes |
| Brass/Gold | Probiotic Spray | 20 Minutes |
Common Mistakes to Avoid
- The Bleach Blunder: As mentioned, bleach is too harsh for the internal components and ineffective against mineral buildup.
- Ignoring the Aerosol Risk: Always keep the bathroom ventilated when cleaning to avoid inhaling aerosolized minerals or bacteria.
- Over-tightening: When reinstalling, hand-tighten the showerhead first. Only use a wrench for the final quarter-turn. Over-tightening can crack plastic internal components.
- Neglecting the Nozzles: Even after a soak, some silicone nozzles may remain clogged. Use a wooden toothpick or a safety pin to manually clear individual jets.
Real-World Examples
- The Hard Water Struggle: A client in Phoenix, Arizona, complained of "stinging" water pressure. Upon inspection, 40% of the nozzles were blocked by fossilized limescale. A 4-hour soak in a commercial descaler followed by a manual clearing of the silicone jets restored the flow to "like-new" status.
- The Guest Room Surprise: A homeowner noticed a musty smell in their guest bathroom. Because the shower hadn't been used in months, MAC bacteria had flourished in the stagnant water. We implemented a "Maintenance Mist" protocol—spraying the head weekly with a water-vinegar solution—to keep the bacteria at bay.
- The Matte Black Fiasco: A DIYer left their trendy matte black showerhead in a vinegar soak overnight. By morning, the finish had developed white, cloudy spots that couldn't be removed. This serves as a reminder that for boutique finishes, less is more.
Frequently Asked Questions
How long should I soak the showerhead in vinegar?
Can I clean a showerhead without taking it off?
Why does my showerhead still have low pressure after cleaning?
Is lemon juice a good alternative to vinegar?
Conclusion
Mastering how to clean showerhead fixtures is a simple yet vital part of home maintenance. By switching to a monthly "maintenance mist" or a deep-soak routine, you can save nearly 3,000 gallons of water per year by ensuring your fixture operates at peak efficiency. As we move further into 2025 and 2026, embracing microbiome-friendly cleaning and regular descaling will keep your bathroom both beautiful and healthy.
Want a Healthier Home?
Discover more professional cleaning secrets in our Surface Cleaning series.
View All Guides