Key Takeaways
- Deep clean your fan every six months to prevent fire hazards and mold.
- Always turn off power at the circuit breaker before beginning work.
- Distilled white vinegar is more effective than bleach for killing mold at the root.
In the hierarchy of home maintenance, the bathroom exhaust fan is often the "hidden hero" that we completely ignore until it starts sounding like a jet engine or fails to clear the steam from your morning shower. However, knowing how to clean bathroom fan units isn't just about aesthetics or noise reduction; it is a critical safety task. A dust-clogged motor is a primary cause of residential electrical fires, and an inefficient fan is an open invitation for mold to take over your drywall.
As we move into 2025 and 2026, indoor air quality (IAQ) has become a focal point of home wellness. Whether you have a traditional model or a modern smart fan with humidity sensors, the best way to clean fan components involves a blend of safety protocols and the right natural cleaners. This guide will walk you through a deep-clean process that ensures your bathroom remains fresh, dry, and safe.
Why Cleaning Your Fan is Non-Negotiable
Most homeowners view bathroom fan cleaning as a "someday" chore. However, the data suggests otherwise. Between 2017 and 2019, the U.S. Fire Administration reported an average of 106,700 multifamily residential fires annually. A significant portion of these incidents originated from electrical malfunctions in small appliances, including exhaust fans.
When lint and dust accumulate on the motor and blades, they create friction. This friction generates heat. If your fan was manufactured before the early 1990s, it likely lacks "thermal protection"—a safety feature that shuts the motor down if it begins to overheat. In these older models, the combination of a hot motor and dry lint can lead to a fire in seconds.
Beyond fire safety, there is the issue of moisture. A dirty fan can see a reduction in airflow by 50-70%. When steam lingers, it seeps into your grout and paint, leading to costly mold remediation projects. By learning how to clean bathroom fan assemblies correctly, you are protecting both your home’s structure and your family's health.
Safety First: The Breaker-First Rule
Before you grab a ladder, you must address the power source. Many people assume that flipping the wall switch to the "off" position is enough. As a professional cleaning consultant, I cannot stress this enough: always shut off the power at the circuit breaker.
By cutting power at the source, you eliminate any risk of the motor engaging while your hands or tools are inside the housing. This is also the perfect time to inspect the age of your unit. If your fan is more than 10 years old, it is approaching the end of its life expectancy. Modern motors are more efficient and significantly quieter, often rated at 1.0 sone or less.
Step-by-Step Deep Cleaning Guide
To achieve a professional-grade clean, you need more than just a quick wipe-down. Follow these steps to ensure every component is free of debris.
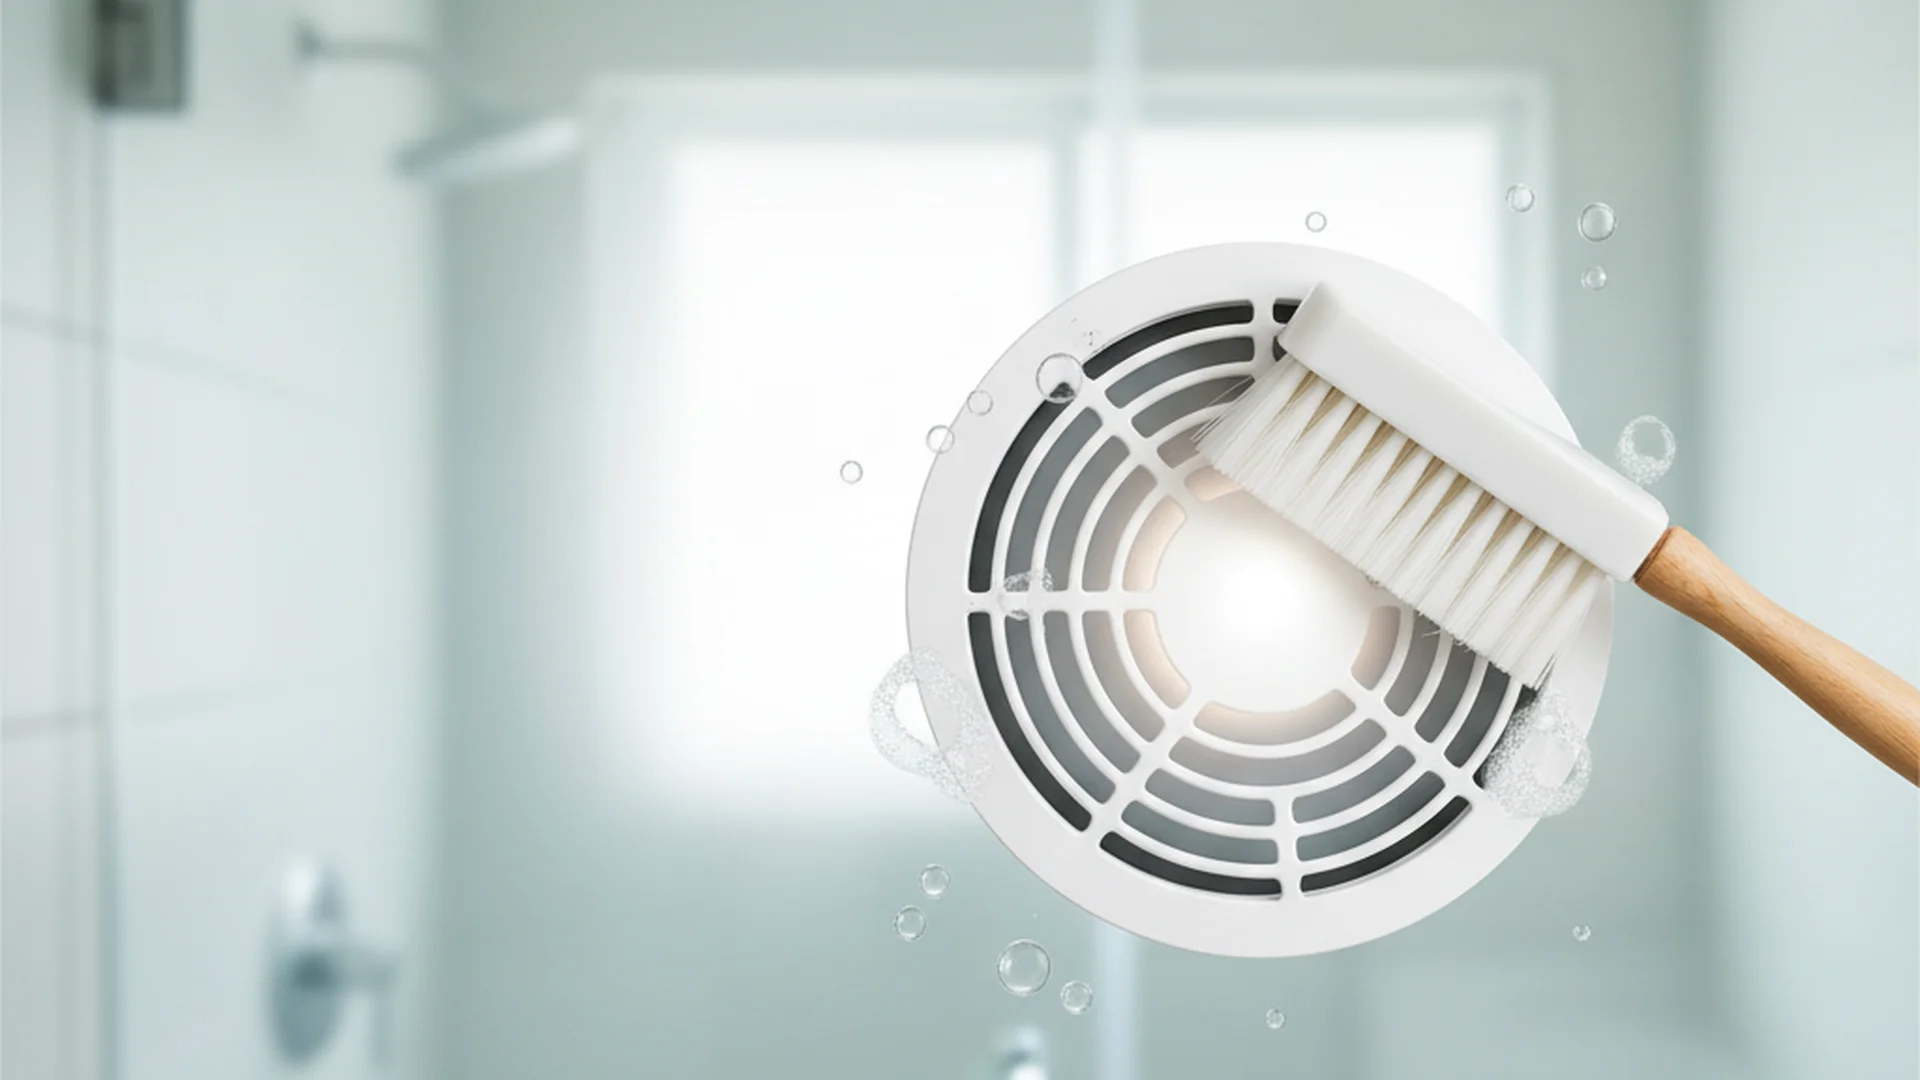
Step 1: Remove the Cover (Grille)
Most covers are held in place by metal tension springs. Pull the cover down slightly, reach inside to squeeze the springs together, and the cover will slide out. If your cover is held by screws, ensure you have a secure grip so it doesn't drop and crack your flooring.
Step 2: Vacuum the Housing
Once the cover is off, you will likely see "dust bunnies" clinging to the interior. Use a vacuum with a brush attachment to gently remove the loose lint. Focus on the areas around the motor and the corners of the housing.
Step 3: Clean the Fan Blades and Motor
In many models, the fan assembly (the "squirrel cage" or blades) can be removed by unscrewing a single mounting plate and unplugging the motor from the internal outlet. If the blades are plastic, they can be cleaned with a damp cloth. If the grime is "caked on," you may need a specialized solution.
Step 4: Inspect the Exterior Vent
One of the most common mistakes is cleaning the interior fan but ignoring the outside exhaust flapper. If birds have nested in the vent or lint has blocked the exit, your fan is essentially pushing air against a wall. This causes the motor to work harder and eventually burn out.
| Component | Cleaning Method | Frequency |
|---|---|---|
| Cover/Grille | Warm soapy water | Every 3 months |
| Fan Blades | Vinegar/Water solution | Every 6 months |
| Motor Housing | Vacuum/Canned air | Every 6 months |
| Exterior Vent | Manual debris removal | Annually |
How to Clean Bathroom Fan Without Bleach
Many homeowners reach for bleach at the first sign of bathroom mold. However, if you want to know how to clean bathroom fan without bleach, the answer lies in your pantry.
Bleach is an oxidizer that can actually corrode the metal components of your fan and cause plastic blades to become brittle and crack over time. Furthermore, bleach is a "surface killer"—it doesn't always reach the roots of mold growing on porous surfaces.
The Vinegar Solution
Distilled white vinegar is the gold standard for fan cleaning. It contains acetic acid, which effectively kills roughly 82% of mold species and penetrates surfaces to prevent regrowth.
The Recipe:
- Mix 1 part white vinegar with 1 part warm water.
- Add 2 drops of grease-cutting dish soap.
- For stubborn, greasy grime (common in bathrooms near kitchens), create a paste of baking soda and water to scrub the plastic blades.
Common Mistakes to Avoid
In my years as a cleaning consultant, I’ve seen the same errors repeated frequently. Avoiding these will extend the life of your fan:
- Wetting the Electrical Components: Even if the power is off, getting the motor windings wet can lead to a short circuit or corrosion once the power is restored.
- Using Too Much Force: Fan blades are often balanced with precision. If you bend or chip a blade while scrubbing, the fan will become "unbalanced," leading to the loud vibrating noise people often complain about.
- Ignoring Lubrication: Older fans often have a small oil port on the motor shaft. Adding 2–3 drops of sewing machine oil after cleaning can significantly reduce friction and noise.
- Running the Fan Too Long: While you should run your fan for 15–20 minutes after a shower, leaving it on all day increases the fire risk.
2025–2026 Trends: The Move to Smart IAQ
If you find that your fan is still loud or ineffective after a deep clean, it might be time to look at the latest technology. The 2025-2026 market is shifting toward "Proactive Indoor Air Quality."
Modern renovations now prioritize:
- Integrated UV-C Light: Some new fan models include internal UV-C sanitizing lights that kill airborne bacteria and mold spores as air passes through the unit.
- Smart Sensors: Rather than a simple on/off switch, smart fans detect humidity levels and Volatile Organic Compounds (VOCs), automatically adjusting their speed to maintain air quality.
- Ultra-Quiet Ratings: The trend is moving toward fans with a rating of 0.3 to 1.0 sones. These are so quiet you may forget they are on, which is why fire departments now recommend automatic timer switches.
Frequently Asked Questions
Can I clean the fan without taking it apart?
Why is my bathroom fan so loud?
Is bleach necessary to kill mold on the fan?
How long should I run the fan after a shower?
Conclusion
Mastering how to clean bathroom fan units is an essential skill for any homeowner. By moving beyond a simple surface wipe and performing a twice-yearly deep clean, you reduce fire risks, prevent mold growth, and ensure your bathroom remains a healthy environment. Remember to ditch the bleach in favor of vinegar, always cut the power at the breaker, and don't forget to check that exterior vent.
With the rise of smart home technology and a renewed focus on air quality in 2026, keeping your exhaust system in top shape is the best way to clean fan components while protecting your home's value.
Want More Maintenance Tips?
Join our newsletter for monthly expert guides on keeping your home safe and clean.
Sign Up Now