Key Takeaways
- Daily "Rinse, Shake, Dry" routines prevent the majority of bacterial buildup.
- 3% Hydrogen Peroxide is the gold standard for breaking down stubborn biofilm.
- Replace nylon brushes every 8 weeks and silicone brushes every 6-12 months.
Maintaining a hygienic kitchen is about more than just wiping down countertops; it is about the tools we use to prepare what we consume. If you have ever wondered how to clean bottle brush tools properly, you are already ahead of the average consumer. Most people assume that because a brush is used with soap and water, it stays clean by default. However, research shows that these essential tools can quickly become breeding grounds for dangerous pathogens if not managed correctly.
As a professional cleaning consultant, I have seen firsthand how a neglected bottle brush can compromise the health of a household. Whether you are cleaning baby bottles, reusable water canisters, or delicate glassware, understanding the science of brush maintenance is critical for a germ-free home.
The Hidden Dangers of a Dirty Bottle Brush
Before we dive into the "how-to," we must understand the "why." Recent studies have revealed that the average reusable water bottle can contain over 300,000 colony-forming units (CFU) per square centimeter. To put that in perspective, that is more bacteria than you would typically find in a kitchen sink or even a dog's water bowl.
A contaminated bottle brush is the primary vehicle for this bacterial transfer. When you scrub a bottle with a dirty brush, you aren't just failing to clean it; you are actively inoculating the bottle with a fresh layer of microbes.
The Biofilm Factor
Bacteria rarely exist as single cells on a surface. Instead, they form a "biofilm"—a slimy, protective layer that anchors them to the bristles of your brush. This biofilm is highly resistant to standard dish soap. If your brush feels slightly slippery even after a rinse, you are likely feeling a mature biofilm.
Real-World Risk: A Cautionary Tale
The risks are not merely theoretical. In one documented clinical case, a contaminated sponge-tipped bottle brush was identified as the source of a Pseudomonas aeruginosa infection in a newborn. This led to neonatal meningitis, a life-threatening condition. This serves as a stark reminder that for households with infants or immunocompromised individuals, brush hygiene is a matter of medical safety.
The Professional Routine: Daily and Weekly Care
The best way clean bottle brush tools involves a two-tiered approach: immediate daily maintenance and a more rigorous weekly disinfection.
The Daily "Rinse, Shake, Dry" Method
Consistency is the enemy of bacteria. Follow these three steps every single time you use your brush:
- Rinse Immediately: Never let a brush sit with milk, smoothie, or juice residue on it. Rinse it under the hottest water your tap can provide to flush out organic matter.
- The Soap Scrub: Apply a single drop of concentrated dish soap directly to the bristles. Rub the bristles against themselves or a clean silicone scrub pad to create friction. This physical agitation is what breaks the initial bond of new bacteria.
- The "Upright" Rule: Shake the brush vigorously to remove excess water. Store the brush head-up in a ventilated stand.
Weekly Deep Cleaning Protocols
Even with perfect daily care, microscopic colonies will begin to form. Once a week, you should perform one of the following deep-clean methods based on your brush material.
| Method | Best For | Duration |
|---|---|---|
| Hydrogen Peroxide Soak | All Materials (Highly Recommended) | 15 Minutes |
| Boiling Water | Silicone Brushes Only | 5 Minutes |
| Dishwasher (Top Rack) | Most Plastics & Silicone | Full Cycle |
| Vinegar Soak | Removing Hard Water/Mineral Deposits | 30 Minutes |
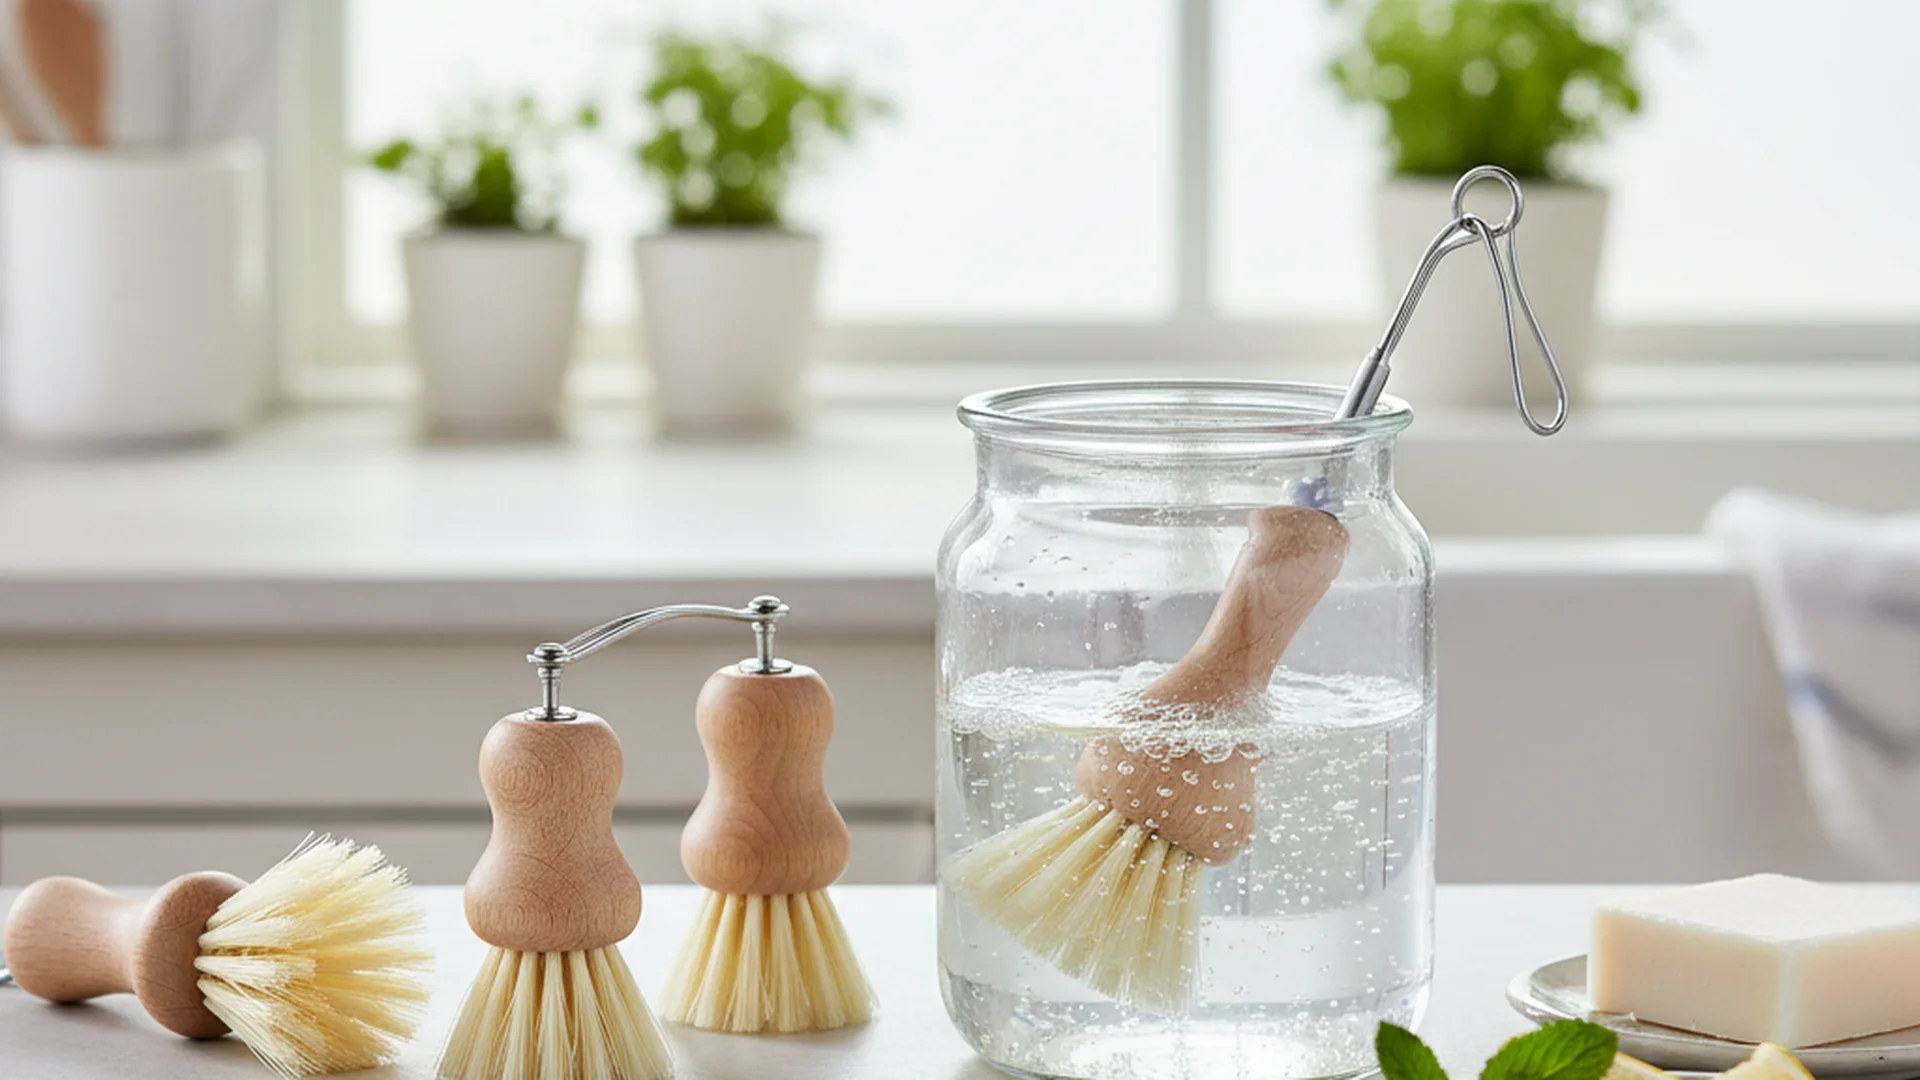
The Hydrogen Peroxide Soak
Hydrogen peroxide (3%) is an oxidizer, meaning it physically "explodes" the cell walls of bacteria and viruses. It is significantly more effective than white vinegar for true disinfection. Submerge the brush head in a small jar of peroxide for 15 minutes, then rinse thoroughly.
The Boiling Water Method
For high-quality food-grade silicone brushes, boiling is the most effective way to ensure total microbial elimination. Silicone can typically withstand temperatures up to 450°F, making a 5-minute boil a safe and chemical-free way to sterilize the tool.
Materials Matter: Nylon vs. Silicone
Not all brushes are created equal. The material of your brush dictates its lifespan and the level of care it requires.
Nylon Bristles
Nylon is the traditional choice. It offers excellent scrubbing power but is porous. Over time, the tips of nylon bristles "fray," creating microscopic crevices where bacteria hide.
- Lifespan: 6–8 weeks.
- Sign of Failure: Splayed or discolored bristles.
Silicone Bristles
Silicone is the modern gold standard. It is non-porous, meaning it does not absorb water or bacteria. It is also significantly more heat-resistant than nylon.
- Lifespan: 6–12 months.
- Sign of Failure: Tearing of the silicone "nubs" or persistent odor.
Future Trends: The 2025–2026 Outlook
The world of kitchen hygiene is evolving rapidly. We are seeing a major shift toward "smart" and "sustainable" cleaning tools.
UV-C Integrated Storage
High-end 2025 models are now hitting the market with storage stands that feature built-in UV-C LEDs. Once you dock your brush, the stand runs a 5-minute sterilization cycle using ultraviolet light, which disrupts the DNA of any remaining pathogens.
Antimicrobial Bristle Technology
2026 trends indicate a rise in brushes infused with silver or copper ions. These materials are naturally antimicrobial, inhibiting the growth of mold and bacteria between uses. While this doesn't replace the need for cleaning, it provides a secondary layer of protection.
Sustainable Modularity
To combat the plastic waste crisis, brands are moving toward modular designs. Instead of throwing away an entire plastic handle, new models feature bamboo or stainless steel handles with replaceable silicone heads. This allows you to swap the cleaning surface every few months without contributing to landfill waste.
Common Mistakes to Avoid
In my consulting work, I see the same three mistakes repeatedly. Avoiding these will immediately improve your kitchen's hygiene.
- Using One Brush for Everything: Never use the same brush for your coffee mugs that you use for baby bottles. This causes cross-contamination. Implement a "zoning" system: one color for baby items, another for general dishes.
- Waiting to Rinse: Allowing protein shake residue or milk to dry on the bristles makes it nearly impossible to fully sanitize the brush later without industrial cleaners.
- Trusting the "Eye Test": Bacteria are invisible. A brush that looks pristine can still harbor thousands of CFUs. Stick to a schedule rather than waiting for the brush to "look" dirty.
Frequently Asked Questions
Can I put my bottle brush in the dishwasher?
How often should I replace my bottle brush?
Is white vinegar enough to kill bacteria on a brush?
Can I use boiling water on a nylon brush?
Conclusion
Understanding how to clean bottle brush tools is a fundamental skill for maintaining a healthy home. By moving beyond a simple rinse and adopting a "Rinse, Shake, Dry" daily routine combined with a weekly hydrogen peroxide soak, you can ensure that your reusable bottles remain a source of hydration rather than a source of illness. As we move into 2026, keep an eye out for antimicrobial and UV-C technologies that make this maintenance even easier.
Ready to Upgrade Your Kitchen?
Discover our recommended antimicrobial cleaning tools today.
Shop Now